
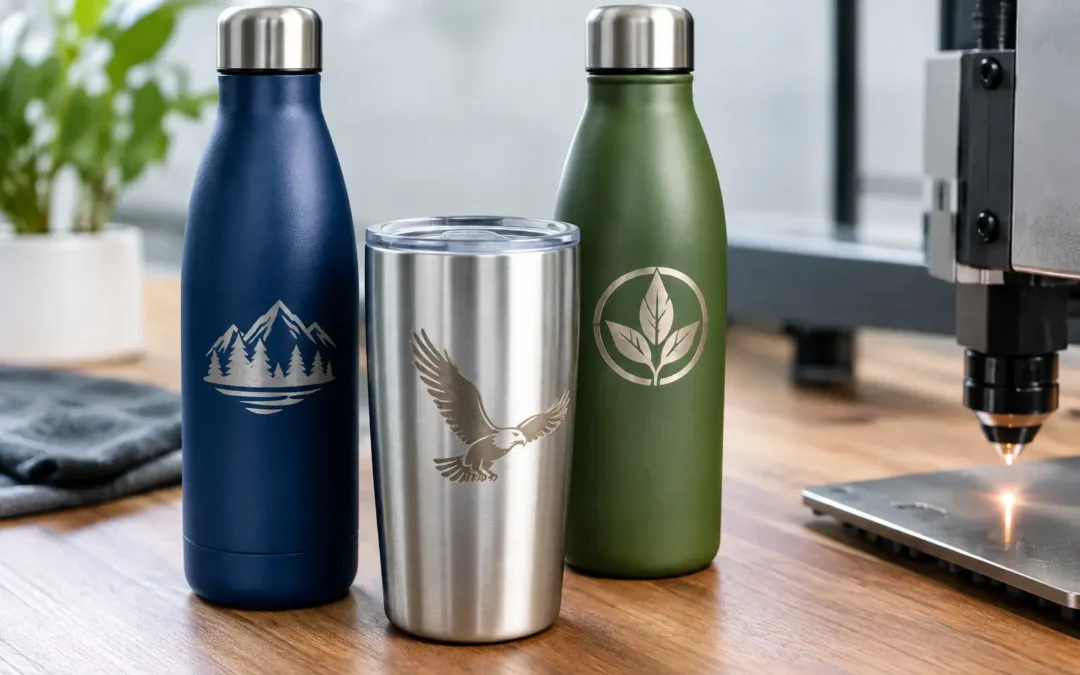
A branded stainless steel tumbler can spend years on a desk, in a work ute or behind a bar. That longevity makes the decoration method matter. Knowing how to laser etch steel helps buyers choose drinkware that carries a clean, durable logo without relying on ink that may wear through after repeated use.
For bulk promotional drinkware, laser etching is valued for its precision, permanent finish and premium appearance. It suits corporate gifts, brewery merchandise, venue glassware alternatives, staff drink bottles and event packs where brand consistency is part of the brief. The result, however, depends on more than placing a logo under a laser. Steel grade, coating, artwork, machine setup and product shape all affect the finished mark.
How to laser etch steel on drinkware
In promotional product terminology, “laser etching” often describes several related laser-marking processes. On bare stainless steel, a laser can create a dark oxidised mark with very little material removal. This is commonly called laser annealing or laser marking. It produces a refined, low-profile result that is well suited to names, logos and fine line artwork.
A laser can also remove a powder-coated finish from a coloured bottle or tumbler. In that case, the laser exposes the stainless steel underneath, producing a high-contrast silver design. This is technically closer to laser engraving than etching, but it is frequently grouped under laser etching in product catalogues and buying conversations.
The right approach depends on the product and the look required. A black powder-coated bottle with a silver logo delivers strong visual contrast from a distance. Bare stainless steel with a subtle dark mark has a more understated, executive feel. Neither is automatically better – the choice should reflect the logo, campaign setting and intended use.
Start with steel that is made for the job
Stainless steel is the usual choice for laser-marked drinkware because it is durable, corrosion-resistant and widely used in insulated bottles, travel mugs, can coolers and tumblers. The surface finish still matters. Brushed stainless can create a softer, more restrained mark, while polished surfaces may show the branding clearly but can also highlight fingerprints and minor handling marks.
Powder-coated stainless steel is particularly effective for prominent branding because laser removal reveals the metal beneath. Coating quality and colour influence the contrast. Dark colours such as black, navy, charcoal and deep green generally provide a crisp silver reveal. Pale finishes may offer less contrast, while textured coatings can affect the sharpness of small lettering.
Not all metal drinkware should be treated as interchangeable. Double-wall vacuum bottles, thin single-wall cups, coated products and vessels with seams or uneven profiles require different handling. A production team should confirm the product’s marking area and test the finish before a full run, particularly when an exact brand colour or fine logo detail is essential.
Use the right laser and fixture
Fibre lasers are generally the preferred equipment for marking stainless steel. They operate at a wavelength that metal absorbs efficiently and can produce fine detail, controlled marks and repeatable results across volume orders. CO2 lasers are widely used for materials such as timber, acrylic and glass, but are not the usual choice for direct marking on bare steel.
For cylindrical drinkware, a rotary attachment turns the bottle, mug or tumbler as the laser marks it. This keeps the artwork positioned correctly around the curve. Without suitable fixturing, a logo can distort, sit off-centre or vary in placement from unit to unit. On a large order, that level of inconsistency is not acceptable.
Fixtures also protect production efficiency. A properly designed jig places each item in the same position, controls the engraving height and speeds up loading. This is one reason a supplier experienced in bulk branded merchandise can deliver more consistent results than a process built around one-off marking.
Prepare artwork for a clean laser-etched result
Laser marking works best with clean, high-contrast artwork. Vector files are preferred because they retain sharp edges at any size and allow the design to be scaled accurately for different drinkware shapes. A logo designed for a large banner may need adjustment before it can be etched onto a narrow bottle.
Fine lines, tiny reversed text and tightly packed detail deserve attention before production. What looks clear on a computer screen can fill in, soften or become difficult to read once reduced to a 30 mm or 40 mm marking area. For best results, simplify intricate elements where needed and allow adequate space between lines and letters.
Before approving artwork, check four practical points:
- The logo is supplied as a suitable vector file or high-resolution black artwork.
- Minimum line weights and text sizes are appropriate for the available print area.
- The selected position works with the bottle’s curve, seam, handle or lid arrangement.
- Any variable data, such as individual names or numbering, has been checked carefully before setup.
Laser etching is generally a single-tone process. On bare steel, the mark may appear dark grey, black or slightly brown depending on the alloy and settings. On powder-coated products, the exposed metal provides the contrast rather than a printed brand colour. If an exact Pantone colour is non-negotiable, screen printing or pad printing may be more suitable than laser decoration.
Choose a marking area that supports the design
A large logo does not always create the strongest branded result. On slim bottles, a considered mark that fits the central panel can look more premium than artwork pushed too close to the sides. On travel mugs, the handle and lid orientation need to be considered so the logo faces correctly when the product is held or displayed.
For event merchandise, a front-facing logo is often the practical choice. For corporate gifting, a smaller logo paired with an individual name can add perceived value. Breweries and venues may prefer a bold logo on a can cooler or tumbler where the brand needs to be recognisable across a bar.
Ask for a visual layout before production, especially when purchasing several product styles. It is easier to adjust the position, scale or orientation at artwork approval than after units have been marked.
Set laser parameters through testing, not guesswork
Laser output, speed, frequency, focus and number of passes all influence the final mark. Too much energy can overheat the surface, create an uneven finish or remove more material than intended. Too little can result in a faint mark that lacks contrast. The best settings vary between products, coatings and even batches of seemingly similar drinkware.
For bare stainless steel, controlled heat creates the dark annealed mark. The aim is a legible, consistent design without deep cutting. For powder-coated steel, settings need to remove the coating cleanly while avoiding unnecessary damage to the exposed metal beneath.
A test mark is a practical quality-control step, not an optional extra. It verifies the artwork, placement and contrast before the full order begins. For high-volume campaigns, a retained approved sample can also provide a useful reference for repeat orders.
Plan for production realities on bulk orders
Laser etching is highly durable, but it is not a shortcut around planning. The total lead time includes product availability, artwork preparation, proof approval, machine setup, marking, quality checks and dispatch. Orders required for a conference, venue opening or seasonal promotion should allow enough time for each stage, particularly where stock is being sourced in volume.
Quantity can affect the most economical decoration choice. Laser marking has no screen setup and is well suited to variable names, lower-volume premium gifts and detailed single-colour artwork. For very large runs with broad, solid artwork, another branding method may be more cost-effective. The product, design and required finish should be assessed together rather than selecting a process on unit price alone.
Quality checks should cover more than whether the logo is present. Inspect placement, legibility, orientation, contrast and the condition of the item after marking. On insulated drinkware, the process should be controlled so that branding does not compromise the product’s presentation or performance.
When laser etching is the best choice
Laser etching is particularly suitable when durability and a premium finish are priorities. It is a strong option for stainless steel drink bottles, vacuum tumblers, barware, staff gifts, club merchandise and branded hospitality products that will receive regular handling and washing.
It may not be the ideal method where a bright multi-colour logo is central to the campaign, or where the selected item has an unsuitable surface. In those cases, choosing a product and decoration method together avoids disappointing compromises later. A practical supplier will explain the options clearly and recommend the finish that supports the intended result, not simply the one requested first.
For Australian organisations buying branded drinkware at scale, the best outcome starts with a suitable steel product, production-ready artwork and a realistic timeline. Get those three details right, and the finished item will do more than carry a logo – it will keep representing the business every time it is picked up.